Category

after effects hand drawn animation style

‘Hand Drawn animation style’ using After Effects

By What I'm Working on (WIWO)No Comments

Animation Test – After Effects


This is a short animation test that was created in 45 mins for a recent project pitch.
It is an attempt to achieve a ‘hand drawn’ 2D animation style using After Effects.
Basic workflow:
[list style=”list_2″] [li]I drew the artwork in Illustrator using Pen tool, modified paths with variable stroke tool to get the look desired.[/li] [li]separated elements into individual layers as required.[/li] [li]imported the .AI in to After Effects[/li] [li]Set comp to 12 FPS.[/li] [li]”Convert Vector to shape layer” command (After Effects CC).[/li] [li]Used wiggle expression on ‘Twist’ and ‘Offset Paths’ Modifiers of the shape layers.[/li] [li]Used a recent fluid sim rendered sequence as a track matte for the colour reveal[/li] [/list]

This is a quick workflow and allows you to approximate the look of the organic moving lines of 2D animation after only drawing one frame.
Also easy to Update and iterate. The wiggle expression is slightly different per layer to not look too computerised. It is easy to apply this expression to other shots.

You can read more about the process in the YouTube comments for this video.

Michael Wentworth-Bell in Hong Kong

Visiting Hong Kong

By Business News, Digital Lode, InspirationNo Comments

I’m Currently spending 2 weeks in Hong Kong and, as always, loving my time here!

[image title=”Returning to Hong Kong in May 2014 with Ivy” width=”544″ height=”332″ align=”center” lightbox=”true” group=”HongKong2014″ icon=”zoom”] http://thelode.com.au/wp-content/uploads/2014/05/Michael_Wentworth_Bell_Hong_Kong.png [/image]

My life journey is tied to Hong Kong in a very special way – it has been a turning point in studies, my career, and where I met the love of my life.

Autodesk Panorama competition – 2009

In 2009 myself and 2 friends entered the first ‘Autodesk Panorama‘ competition, creating a short 2 minute 3D animation in 3 and a half weeks to meet the deadline. We were extremely lucky to have been chosen as Australian finalists.

We were flown by Autodesk as Team Belfast with the other Australian finalist team to Hong Kong where we got to attend a 4 day intensive boot camp with other finalists – Students from 11 countries.

[image title=”Group Shot of the Panorama Boot Camp entrants, organisers and mentors.” width=”544″ height=”306″ align=”center” lightbox=”true” group=”HongKong2014″ icon=”zoom”] http://thelode.com.au/wp-content/uploads/2014/05/Autodesk_Panorama_Competition_2009.jpg [/image]

The boot camp was mediated and mentored by 4 industry professionals including Markus Kurtz from Rhythm and HughesDaniel Thompson from Rising Sun Pictures and Benjamin Huber from Industrial Light & Magic / Lucasfilms.

Meeting Ivy

After the competition, we decided to stay on in Hong Kong for an extra 5 days – it was the first time the 3 of us uni mates had ever been overseas. it was during this time that I met an acquaintance who became a pen-pal, friend, girlfriend, is now my fiance and next year will be my wife.

[image title=”Visiting Hong Kong Disneyland with Ivy in 2011″ width=”544″ height=”363″ align=”center” lightbox=”true” group=”HongKong2014″ icon=”zoom”] http://thelode.com.au/wp-content/uploads/2014/05/Michael_Wentworth_Bell_Disneyland.jpg [/image]

The Panorama 2009 experience changed my life completely. I have since finished my Uni degree and am working in the 3D animation industry.With Ivy, i’ve continued to return to Hong Kong once a year, Staying around 1-6 weeks each time.  One of my recent trips to Hong Kong was shared with my sister and best mate James, and my parents have travelled to Hong Kong this time to spend time with Ivy’s family. It is the first time my father has left Australia!

[image title=”‘Bliss’ – one of a series of mini-planet panoramas I have made while in Hong Kong” width=”544″ height=”544″ align=”center” lightbox=”true” group=”HongKong2014″ icon=”zoom”] http://thelode.com.au/wp-content/uploads/2014/05/Michael_Wentworth-Bell_Hong_Kong_Stanley.jpg [/image]

I absolutely love the bustling and extremely busy Hong kong. The people, the food, amazing transport and architecture of this insane mecha-city.

PMQ Artist Hub, Hong Kong

Also a big fan of the art community in Hong Kong. This trip, Ivy and I have visited the newly opened PMQ artist’s hub located in Central, Hong Kong.

[image title=”‘The PMQ Artist hub in Hong Kong” width=”544″ height=”813″ align=”center” lightbox=”true” group=”HongKong2014″ icon=”zoom”] http://thelode.com.au/wp-content/uploads/2014/05/PMQ_Hong_Kong_2014.jpg [/image]

Still early days for the PMQ precinct, but it is a state of the art setup with some very interesting tenants and a  lot of great events planned later this year – i’m very annoyed that i’ll be missing out!

Art Basel Hong Kong 2014

We’ve also visited the Art Basel exhibition which was mind-blowing in its sheer scale. 2 absolutely massive exhibition spaces with thousands of artworks on display from all over the world.

[image title=”Ivy and I at Art Basel Hong Kong 2014″ width=”544″ height=”716″ align=”center” lightbox=”true” group=”HongKong2014″ icon=”zoom”] http://thelode.com.au/wp-content/uploads/2014/05/Art_Basel_Hong_Kong_2014.jpg [/image]

Some very truly inspiring pieces amongst some of the more tame and conventional work. The best work was coming out of Beijing and Korea.

Local Industry

I am always trying to keep up-to-date with what the local HK studios are producing in the area of 3D animation, visualisation and broadcast. Particularly impressed with FATFace and Treehouse studio.

I’ve had a great 2 weeks in Hong Kong this year and look forward to returning in aroud a year’s time. To any HongKongers in the 3D Animation / Design industry, please do hit me up if you visit Melbourne, Australia sometime!

RealFlow Demo reel

RealFlow showreel – Reel Pictures

By Current Projects, My PortfolioNo Comments

Check out our first RealFlow showreel! This demoreel is a compilation of all the fluid simulation projects we’ve produced at Reel Pictures, Melbourne over the past 6 months.

I worked on every sequence together with Alf Kuhlmann – the Director of Reel Pictures.

The first project is the ‘Wonder of Gold’ – an AV Installation for the Perth Mint, Australia.

The AV is presented on a large 12×2 metre wrap-around screen and involved many different RealFlow simulations, some fluid simulations running over 30 seconds long.

Find out more about Reel Picture’s work on the Wonder of Gold project here.

The second project featured is a series of animated videos created for Amtek. These are looping videos for interactive gaming and again required many different types of fluid simulations.

Very diverse, very varied, very fun to produce! (And a little bit complicated when you need fluid sims, fire, falling nuggets, etc all to LOOP every 5 seconds).

Realflow Dspline Daemon tutorial and project overview

Tutorial – Realflow D-Spline Daemon & Project Overview

By Digital Lode Tutorials, TutorialsNo Comments

Here’s a recent tutorial I put together focusing on a project i’ve worked on with Alf Kuhlmann at Reel Pictures over the past 5 months. The video is made up of a project overview of ‘The Wonder of Gold’ animation and a RealFlow tutorial. We supplied 3D animation for this video installation that is now showing on a 12metre x 1.8metre wrap-around screen at the Perth Mint in Western Australia.

The second part of the video is a comprehensive tutorial focusing on the ‘D-Spline’ Daemon in RealFlow. We used the Dspline to create the ‘magical’ flowing water in one of the sequences in the Wonder of Gold.

Realflow – Dspline tutorial & Project Overview

If you found this useful, please check out the Reel Pictures website or our facebook page where we will strive to keep posting more videos soon.
Cheers! – Michael Wentworth-Bell.


Button Text


BASF Mining 3D Modelling and Render

Updating the porfolio and website

By Digital Lode, Site NewsNo Comments

I’m back and determined to update my Website, Portfolio and Showreel after far too long. It’s been over 1 and a half years since I did an update to my Portfolio and this website is in need for some TLC. My last (and only) showreel was made when I was still in Uni in 2009(!) and updated only slightly when I graduated in 2011. So now it’s high-time for a new showreel.

As I work on my showrell, I’ve gone back to late 2012 and i’m adding my favourite projects since then one-by-one. I’ve started tonight with a 3D image I created for a BASF print advertistment in October 2012.

[image title=”The final BASF print Ad ” width=”544″ height=”681″ lightbox=”true” group=”BASF”  icon=”zoom”]http://thelode.com.au/wp-content/uploads/2014/02/BASF_Poster_3D_Artwork.jpg[/image] [image title=”Final 3D render – Closeup view” width=”544″ height=”460″ lightbox=”true” group=”BASF”  icon=”zoom”]http://thelode.com.au/wp-content/uploads/2014/02/BASF_Poster_Crop_01.jpg[/image] [image title=”Closeup of one of the ‘spores’. Wireframe view from 3ds Max viewport” width=”544″ height=”305″ lightbox=”true” group=”BASF”  icon=”zoom”]http://thelode.com.au/wp-content/uploads/2014/02/BASF_Poster_3DS_max_nitrous_viewport_04.jpg[/image]

I’ve made a new page for this particular portfolio item. You can view the final image and read more about it here.

Looking forward putting some new work out there!

Members of the Peterson Clan, Australia - in Barfold, December 2013

2013 – year in review

By Business News, Digital Lode, InspirationOne Comment
[image title=”Some of my extended family – members of the Peterson clan in Christmas, 2013″ width=”544″ height=”412″ align=”center” lightbox=”true” group=”michael2013″ icon=”zoom”] http://thelode.com.au/wp-content/uploads/2014/01/Peterson_Clan_Barfold_2013.jpg [/image]

Wishing a happy new year in 2014 to my Clients, Family and friends!

As we wave goodbye to 2013 and begin the new year, I’m excited to put together a quick review of my highlights over the last twelve months.

Getting engaged

My most exciting moment this year by far has been proposing to my Girlfriend Ivy. I proposed to her 4 years to the day we first met, and 3 ½ years after we first started our romance together. It has been the greatest 4 years of my life – Ivy has given me so much love and support and has made me a better person in countless ways since the day I met her. I am very lucky to be spending the rest of my life with this amazing and inspiring woman!

[image title=”My proposal to Ivy – 4 years to the day we first met” width=”544″ height=”362″ align=”center” lightbox=”true” group=”michael2013″ icon=”zoom”] http://thelode.com.au/wp-content/uploads/2014/01/Michael_Ivy_Engagement.jpg [/image]

I proposed to Ivy at sunset at the top of Mt. Dandenong, Melbourne. We walked down the Kyeema track to the main lookout point and Ivy was shocked to find a large ring of fairy lights circling the vantage point. As we approached the fairy lights I laid down a picnic blanket in the middle of the circle and 2 of my closest friends, James and John, appeared from behind the trees playing the Beatles’  ‘And I Love her’ on acoustic guitar.

I sang the song to Ivy as they provided the backing music. I then picked up a 3rd acoustic guitar to perform the guitar solo before the song finished. I then knelt down and proposed to her. It was the greatest moment of my life, and I was quite embarrassed because there about 10-15 people standing by watching – I hadn’t realised the lookout was such a popular spot!

The whole moment was captured on video and with photos by my Boss and friend Alf Kuhlmann, who I have had a relationship with longer than Ivy haha. I owe my friends a lot of gratitude for their support on that special day.

[image title=”My proposal to Ivy – 4 years to the day we first met” width=”544″ height=”362″ align=”center” lightbox=”true” group=”michael2013″ icon=”zoom”] http://thelode.com.au/wp-content/uploads/2014/01/Ivy_Michael_Engagement_Friends.jpg [/image]

Earlier this year I was extremely happy to see my best friend get engaged to his long-time partner and my sister celebrate her engagement with my soon-to-be brother in law. Many Close friends have become engaged and have become married throughout the year. It’s been a big year for love and one i’ll always look back on with fond memories for the rest of my life!

Full time role at Reel Pictures

I have been very lucky this year to be offered a full-time position at Reel Pictures. One of my first industry roles was at Reel Pictures in 2010 via the Swinburne industry placement program. After that 1 year placement I returned to Uni to finish my degree, but have continued to work for Alf Kuhlmann as a freelance motion graphics artist and 3D generalist. Early this year I was given the opportunity to work full-time with Alf and was very happy to accept it.

I have been able to work on some very exciting and technically demanding projects this year for a variety of clients. We have created motion graphics and 3D animation for TVCs, corporate videos, accident re-enactment/use in court cases and created 3D content for permanent installations.

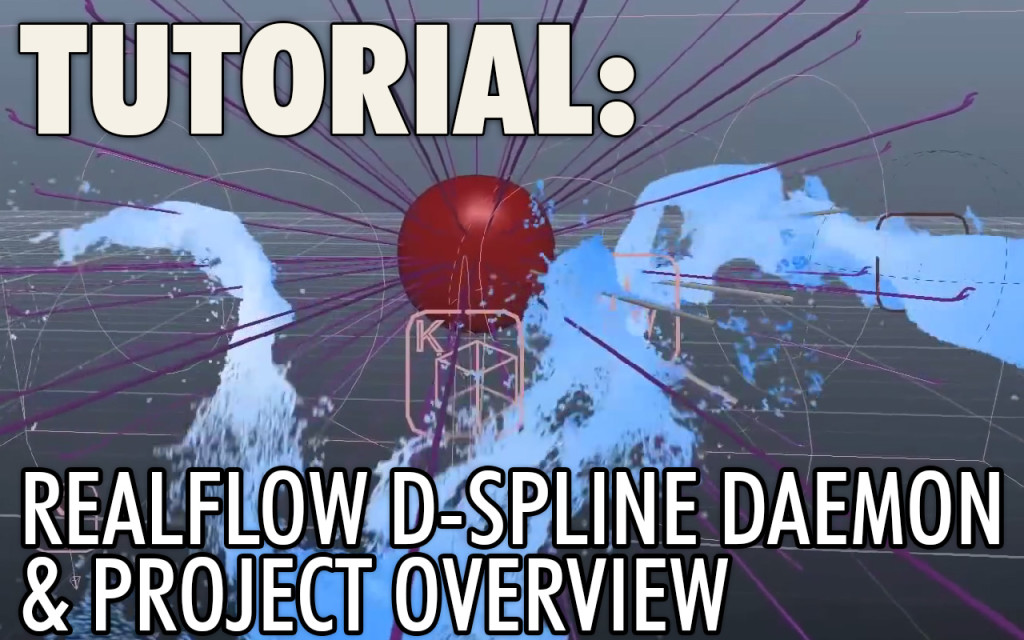
The most exciting highlight has definitely being a part in creating a large ‘Wonder of Gold‘ animation for the Perth Mint. We used RealFlow extensively for this project and it was the perfect opportunity to learn this extremely powerful software.

[image title=”Screenshot of the ‘Big Bang’ Sequence” width=”544″ height=”82″ align=”center” lightbox=”true” group=”michael2013″ icon=”zoom”] http://thelode.com.au/wp-content/uploads/2014/01/Reel_Pictures_01.jpg [/image]
Above – a screenshot from the ‘Big Bang’ Sequence. This was created 100% in 3DS Max using Particle Flow. A big thanks goes to Allan McKay – as part of this explosion, we used one of his fantastic ‘Particle Flow Presets’ which have shipped free with 3ds Max for the past few years.
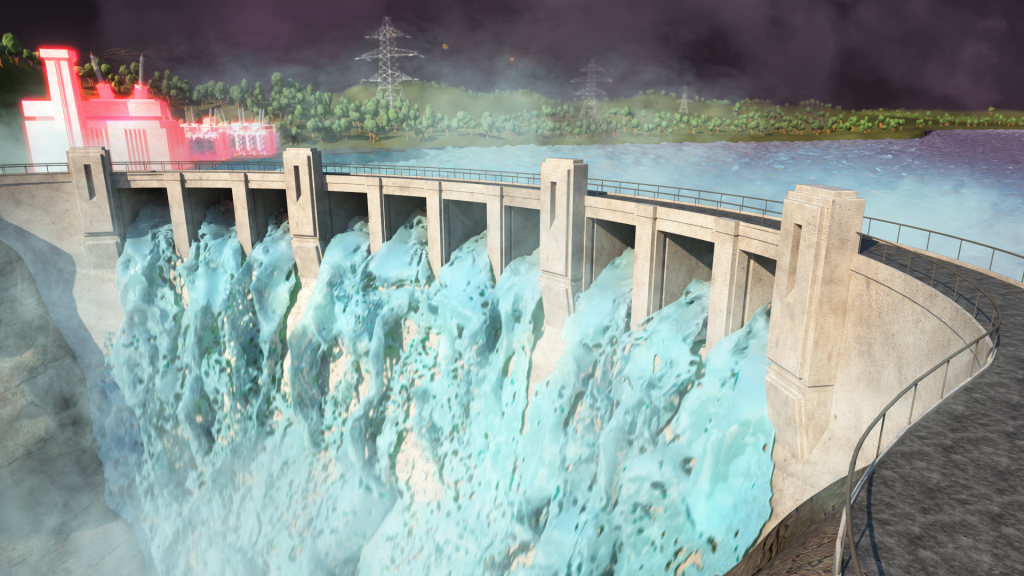
[image title=”A screenshot of an Egyptian themed sequence using the D-Spline daemon to direct the fluid along a path.” width=”544″ height=”82″ align=”center” lightbox=”true” group=”michael2013″ icon=”zoom”] http://thelode.com.au/wp-content/uploads/2014/01/Reel_Pictures_02.jpg [/image]
Above – A screenshot of an Egyptian-themed sequence using the D-Spline daemon to direct the fluid along a path.
[image title=”Gold nuggets glittering amongst the pebbles in a stream.” width=”544″ height=”82″ align=”center” lightbox=”true” group=”michael2013″ icon=”zoom”] http://thelode.com.au/wp-content/uploads/2014/01/Reel_Pictures_03.jpg [/image] [image title=”Gold nuggets glittering amongst the pebbles in a stream.” width=”544″ height=”82″ align=”center” lightbox=”true” group=”michael2013″ icon=”zoom”] http://thelode.com.au/wp-content/uploads/2014/01/Reel_Pictures_04.jpg [/image] [image title=”Gold nuggets glittering amongst the pebbles in a stream.” width=”544″ height=”82″ align=”center” lightbox=”true” group=”michael2013″ icon=”zoom”] http://thelode.com.au/wp-content/uploads/2014/01/Reel_Pictures_05.jpg [/image]
Above – Gold nuggets glittering amongst the pebbles in a stream. This sequence was around 650 frames long and averaged about 4GB of data per frame. This data footprint includes the Realflow Sim data for Core fluid, foam, splash and Meshes, Rayfire Cache sim data and Open EXR renders. The Realflow simulation data filesize is definitely an issue that needs proper management on behalf of the FX artist! If you’re not careful, and accidentally enter the wrong setting when running a simulation, it’s easy to completely fill up a 4TB RAID drive overnight! Artists have written scripts to avoid just that!
[image title=”Golden Artifacts circle liquid Gold that is frozen in time” width=”544″ height=”82″ align=”center” lightbox=”true” group=”michael2013″ icon=”zoom”] http://thelode.com.au/wp-content/uploads/2014/01/Reel_Pictures_09.jpg [/image]
Above – Golden Artifacts circle liquid Gold that is frozen in time
[image title=”Golden Artifacts circle liquid Gold that is frozen in time” width=”544″ height=”82″ align=”center” lightbox=”true” group=”michael2013″ icon=”zoom”] http://thelode.com.au/wp-content/uploads/2014/01/Reel_Pictures_06.jpg [/image] [image title=”Golden Artifacts circle liquid Gold that is frozen in time” width=”544″ height=”82″ align=”center” lightbox=”true” group=”michael2013″ icon=”zoom”] http://thelode.com.au/wp-content/uploads/2014/01/Reel_Pictures_07.jpg [/image] [image title=”Golden Artifacts circle liquid Gold that is frozen in time” width=”544″ height=”82″ align=”center” lightbox=”true” group=”michael2013″ icon=”zoom”] http://thelode.com.au/wp-content/uploads/2014/01/Reel_Pictures_08.jpg [/image]
Above – Screenshots from scene 5 in the Wonder of Gold animation. This sequence was the most technically challenging and took a lot of R&D as the entire planet earth was made up of a liquid golden ocean. We ended up using RealWave on a flat polygon plane and the realflow 2013 Graph feature to conform the Plane to a 3d sphere. Also extensively used the fantastic HOT4MAX plugin. There was a lot of steps and but the client was very happy with the final result and I would love to make a tutorial about it one day!

Lecturing – Motion Graphics

This year I have also been offered a role as a sessional lecturer at Swinburne University of Technology. I helped teach the ‘Typography for Screen & Motion subject in Semester 2. The subject is an overview of Typography and it’s application for screen apposed to Print via an introduction to Motion Graphics using Adobe After Effects. This subject is taken by a range of design students. Our class had students from Digital Media Design, Communication Design, Interior Design, Film & TV and Industrial design!

It was great fun helping deliver this subject to students and introducing them to After Effects. After Effects is extremely popular in motion graphics but there are so many opportunites to use it in many design & digital media disciplines. it’s a very important program to add to your toolset, that’s for sure!

I had the opportunity to update the coursework and contribute 5 new tutorials to the subject. This was the last time this subject was offered as part of the faculty of Design before Swinburne changes the Design Campus from Prahran to Hawthorn and the subject will be revised into 3 new After Effects subjects at beginner, intermediate and advanced levels. This is an exciting time to be involved with the course and I hope to continue to be a part of its evolution in the future.

Digital Lode

2013 has been a good year for my own design practice – the Digital Lode. Due to my new roles at Reel Pictures and Swinburne, I have scaled down the amount of projects I am taking on. I have found this to be a very good arrangement because I am able to choose & commit to projects that really interest me. I have worked on a variety of different projects this year, but my main focus continues to be 3D design for print. I have worked on various posters, websites and other promotional materials. In the coming year I hope to continue to work on exciting projects via the Digital Lode!

Travelling Overseas

Earlier this year I traveled overseas with my partner Ivy and spent a month visiting Hong Kong, Mainland China and Thailand. I had an incredible time visiting Ivy’s extended family and celebrating Chinese New Year with them in Ivy’s hometown of Chenzhou.

[image title=”Celebrating Chinese New Year with my Partner and her extended family” width=”544″ height=”363″ align=”center” lightbox=”true” group=”michael2013″ icon=”zoom”] http://thelode.com.au/wp-content/uploads/2014/01/China_01.jpg [/image] [image title=”Fireworkds during Chinese New Year” width=”544″ height=”369″ align=”center” lightbox=”true” group=”michael2013″ icon=”zoom”] http://thelode.com.au/wp-content/uploads/2014/01/China_02.jpg [/image]

I cannot wait to visit Ivy’s family again in early 2014. This time my parents are coming also – the first time my Dad will have left Australia. Norfolk Island doesn’t count!


Buchanan – Human Spring

One of my favorite projects of 2013 at Digital Lode has been creating the cover art for Buchanan’s debut album, Human Spring. I worked on this project over a period of 6 weeks at the start of 2013. The album was official unveiled and released in April/May and is now available in both digital and print over various music services. To find out more about the album and their music, check out the official Buchanan Site.

[image title=”Buchanan – Human Spring – Cover Artwork” width=”544″ height=”177″ align=”center” lightbox=”true” group=”michael2013″ icon=”zoom”] http://thelode.com.au/wp-content/uploads/2014/01/Buchanan_Album_Cover.jpg [/image]

This was a challenging and incredibly fulfilling job. I had a fantastic experience forming a working relationship with the band’s front-man Josh Simons, who came up with the original concept for the cover art, and helped Art Direct the artwork over the course of its creation.

It was through this artwork that I received an invitation to join the 3ds Max beta program. This is a community of Autodesk 3ds Max users that test and evaluate early versions of the software. I was able to road-test Autodesk 3ds Max 2014’s ‘populate’ feature during it’s development and provided feedback based on my experience creating the Human Spring cover art. There were over 400 Populate people used to make up the crowd in the cover art.

I created this video overview of the Human Spring project which was used as a ‘sneak peek’ video for the Populate feature in the leadup to the release of 3ds Max 2014.


New Skills – Realflow, DT, Coursera

2013 has been a year of continued learning, which anyone working in industries like this will be doing for the rest of their lives! Much of the fundamentals of design and animation stay the same, but most of the technical skills that I remember learning when I first started studying 3D Animation have changed drastically or been completely superseded!

To keep up with the fast past developments in this industry, i’ve signed up for a few different services this year.

I signed up for the free university ‘Coursera’ at the start of 2013 and enrolled in a few subjects. Coursera is an amalgamation of tertiary level degrees, subjects and classes that are offered by top universities from around the world, including Harvard, Stanfard and Melbourne University. It’s completely free and accessible to anyone with an internet connection and is therefore an extremely important and generous initiative!

I’ve enrolled in a few different classes this year. The first class was the Introduction to computer programming with Python. This is an amazing 12~ week crash course in computer programming offered by Rice University. Other classes i’ve enrolled in include an Introduction to Public Speaking and the extremely interesting subject Internet History, Technology and Security.

As well as Coursera, i’ve been subscribing to Digital Tutors on-and-off throughout the year. This site is fantastic with over 4000 hours of digital media and visual effects courses for all the industry software. There are standard ‘software tutorial videos’ and project based ‘creative development’ courses that are presented by top professionals in the industry. Finally, there are learning paths that arrange all these key videos into playlists to guide you through learning a software from scratch. I used the 60+ hour RealFlow learning path to get up to speed with RealFlow while working on the Wonder Of Gold Animation with Reel Pictures.

Finally, I found the lecturing job at Swinburne has been a fantastic opportunity for me to stay on top of the industry and keep my finger on the pulse of all the latest trends and workflows in motion design. A lot changes in just 12 months and by teaching a motion graphics subject I force myself to be refining my craft and learning the very best techniques.


Growth Partnership Course

I attended a week-long Growth Partnership course for the second year in a row. ‘GP’ is organised and run by the multi-talented Andrew Chua. The main portion of the course is a 72 hour stint in French Island accompanied only by a partner of your choice. I went with my best friend James and we spent the time setting up a basecamp, exploring the swamps, playing guitar and talking about the big issues in life. Half-Life 3 – is it coming? Is it true that there is a place in someone’s brain that if you shoot it, their head will explode? Etc.

[image title=”Fireworkds during Chinese New Year” width=”544″ height=”403″ align=”center” lightbox=”true” group=”michael2013″ icon=”zoom”] http://thelode.com.au/wp-content/uploads/2014/01/FrenchIsland1.jpg [/image]

It was a fantastic rare opportunity to escape your normal life, switch off from everything and focus on The island 20km x 12km island has no running water, electricity, sealed roads, law enforcement or council. There are 95 residents and 2 ferries to/from the island operating everyday. The perfect setting for this course.


Thanks for reading!

These are some of the highlights I’ve had in relation to my work and personal life in 2013. Thanks for your interest in me and for reading this post. A very big thanks to all the people who have helped and assisted me in work and personal life over the past year.

Thanks to the people who have offered me so many fantastic opportunities and to everyone i’ve had the chance to work with. I look forward to what the next 12 months have to bring and I wish you all the best in 2014!


Alias Maya Version 1.0 (Now Autodesk Maya)

Alias Maya version 1.0 – Photos

By Digital Lode, SoftwareNo Comments

[image width=”544″ height=”683″ align=”center” lightbox=”true” group=”MAYA” icon=”zoom”] http://thelode.com.au/wp-content/uploads/2013/08/Alias_Maya_version_1_Photos_01.jpg [/image]

I wanted to make a quick blog post to share a few photos of a recent addition to my LODE bookshelf – an unused copy of Maya Version 1 for SGI!

[image width=”544″ height=”363″ align=”center” lightbox=”true” group=”MAYA” icon=”zoom”] http://thelode.com.au/wp-content/uploads/2013/08/Alias_Maya_version_1_Photos_02.jpg [/image]

I was very happy a few months ago when this heavy box arrived at the studio from Woodland Hills in the USA.

[image width=”544″ height=”363″ align=”center” lightbox=”true” group=”MAYA” icon=”zoom”] http://thelode.com.au/wp-content/uploads/2013/08/Alias_Maya_version_1_Photos_03.jpg [/image]

It was extremely exciting trying to get this safely out of the box and see what early adopters of Maya would have received in return for their $40,000~ software investment. The entire packaging was very impressive!

[image width=”544″ height=”363″ align=”center” lightbox=”true” group=”MAYA” icon=”zoom”] http://thelode.com.au/wp-content/uploads/2013/08/Alias_Maya_version_1_Photos_04.jpg [/image]

The manual was broken up into a series of books known collectively as the ‘Maya Library.’ Each book in the Maya Library focused on a certain aspect of the software, Dynamics, Modelling, Rendering, etc.

When Maya 1.5 came out, it had new and updated versions of certain books. Unfortunately this set is missing at least 1 of the books…I know there is meant to be a book dedicated to MEL (Maya’s scripting language). Was there any other books?

[image width=”544″ height=”363″ align=”center” lightbox=”true” group=”MAYA” icon=”zoom”] http://thelode.com.au/wp-content/uploads/2013/08/Alias_Maya_version_1_Photos_05.jpg [/image]

I really wish Software was still available in such a complete physical package these days. Just look at what you received when you bought a Maya 1.0 licence!

[image width=”544″ height=”363″ align=”center” lightbox=”true” group=”MAYA” icon=”zoom”] http://thelode.com.au/wp-content/uploads/2013/08/Alias_Maya_version_1_Photos_06.jpg [/image]

I still remember when I bought my licence for Maya 2011. There was a knock at the studio door – I opened it to find a tiny little box on the ground and the postman already driving off and around the corner! What did i get for parting with my hard earned cash? A crappy little DVD case worth about $1!

[image width=”544″ height=”363″ align=”center” lightbox=”true” group=”MAYA” icon=”zoom”] http://thelode.com.au/wp-content/uploads/2013/08/Alias_Maya_version_1_Photos_08.jpg [/image]

The software companies say that reduced packaging helps save the environment and it obviously helps them save heaps of money in printing, binding, packaging and postage, but I think it would be great if you could still order all these great printed manuals, awesome box and goodies as an optional extra, or received all this once only with your initial licence purchase and then all further upgrades could come in just their crappy dvds!

 Maya 1 came with printed documentation – an entire bound book for every aspect of the software! Maya’s online help has always been great, but I still do love reading books and it’s great to be able to sit down and really read everything the developers wanted you to know about one particular module of the software.

[divider_line_padding]

The actual Software CDs were still shrink wrapped and completely unopened! I initially wanted to keep it unopened incase it would be worth something in the future…but honestly…it seems very few people see value in holding onto a piece of 14 year old software that will no longer run without the correct hardware.

[image width=”544″ height=”816″ align=”center” lightbox=”true” group=”MAYA” icon=”zoom”] http://thelode.com.au/wp-content/uploads/2013/08/Alias_Maya_version_1_Photos_09.jpg [/image]

I just couldn’t help slipping the plastic open to have a look inside!

[image width=”544″ height=”363″ align=”center” lightbox=”true” group=”MAYA” icon=”zoom”] http://thelode.com.au/wp-content/uploads/2013/08/Alias_Maya_version_1_Photos_10.jpg [/image]

[image width=”544″ height=”363″ align=”center” lightbox=”true” group=”MAYA” icon=”zoom”] http://thelode.com.au/wp-content/uploads/2013/08/Alias_Maya_version_1_Photos_11.jpg [/image]

There’s a small booklet with a written introduction by Penny Wilson,  CEO of Alias.

[image width=”544″ height=”357″ align=”center” lightbox=”true” group=”MAYA” icon=”zoom”] http://thelode.com.au/wp-content/uploads/2013/08/Alias_Maya_version_1_Photos_12.jpg [/image]

There’s also a CD with scene files, assets and a collection of videos featuring video interviews and work produced by studios with beta versions of the software. Really looking forward to checking these out!

[image width=”544″ height=”334″ align=”center” lightbox=”true” group=”MAYA” icon=”zoom”] http://thelode.com.au/wp-content/uploads/2013/08/Alias_Maya_version_1_Photos_13.jpg [/image]

These CDs do not run on a Windows Machine. I’m on the lookout for an SGI O2 to get this software up and running!

[image width=”544″ height=”355″ align=”center” lightbox=”true” group=”MAYA” icon=”zoom”] http://thelode.com.au/wp-content/uploads/2013/08/Alias_Maya_version_1_Photos_14.jpg [/image]

[image width=”544″ height=”354″ align=”center” lightbox=”true” group=”MAYA” icon=”zoom”] http://thelode.com.au/wp-content/uploads/2013/08/Alias_Maya_version_1_Photos_15.jpg [/image]

[image width=”544″ height=”363″ align=”center” lightbox=”true” group=”MAYA” icon=”zoom”] http://thelode.com.au/wp-content/uploads/2013/08/Alias_Maya_version_1_Photos_16.jpg [/image]

[image width=”544″ height=”347″ align=”center” lightbox=”true” group=”MAYA” icon=”zoom”] http://thelode.com.au/wp-content/uploads/2013/08/Alias_Maya_version_1_Photos_17.jpg [/image]

As well as the main CD Case and ‘Maya Library’ documentation, there was the usual release notes, system requirements, terms and conditions and installation info.

[image width=”544″ height=”343″ align=”center” lightbox=”true” group=”MAYA” icon=”zoom”] http://thelode.com.au/wp-content/uploads/2013/08/Alias_Maya_version_1_Photos_21.jpg [/image]

Qualification & System requirements for Maya version 1 and included software.

[image width=”544″ height=”363″ align=”center” lightbox=”true” group=”MAYA” icon=”zoom”] http://thelode.com.au/wp-content/uploads/2013/08/Alias_Maya_version_1_Photos_07.jpg [/image]

Here’s some photos of the Maya Version 1 release notes, including known limitations with the software:

[image width=”544″ height=”327″ align=”center” lightbox=”true” group=”MAYA” icon=”zoom”] http://thelode.com.au/wp-content/uploads/2013/08/Alias_Maya_version_1_Photos_22.jpg [/image]

[image width=”544″ height=”363″ align=”center” lightbox=”true” group=”MAYA” icon=”zoom”] http://thelode.com.au/wp-content/uploads/2013/08/Alias_Maya_version_1_Photos_23.jpg [/image]

[image width=”544″ height=”363″ align=”center” lightbox=”true” group=”MAYA” icon=”zoom”] http://thelode.com.au/wp-content/uploads/2013/08/Alias_Maya_version_1_Photos_24.jpg [/image]

[image width=”544″ height=”363″ align=”center” lightbox=”true” group=”MAYA” icon=”zoom”] http://thelode.com.au/wp-content/uploads/2013/08/Alias_Maya_version_1_Photos_25.jpg [/image]

And below, a couple of photos some of the Maya Library manuals. Part of the ‘Animation’ volume:

[image width=”544″ height=”311″ align=”center” lightbox=”true” group=”MAYA” icon=”zoom”] http://thelode.com.au/wp-content/uploads/2013/08/Alias_Maya_version_1_Photos_18.jpg [/image]

And a photo of the Dynamics volume:

[image width=”544″ height=”355″ align=”center” lightbox=”true” group=”MAYA” icon=”zoom”] http://thelode.com.au/wp-content/uploads/2013/08/Alias_Maya_version_1_Photos_19.jpg [/image]

The Rendering volume:

[image width=”544″ height=”363″ align=”center” lightbox=”true” group=”MAYA” icon=”zoom”] http://thelode.com.au/wp-content/uploads/2013/08/Alias_Maya_version_1_Photos_20.jpg [/image]

Though i’m now working primarily with 3DS max, Maya was my first proper introduction to the world of 3D, I spent many sleepless nights getting to grips with the basics of the 3D pipeline and I absolutely love Maya for allowing me to bring my dreams to life!

[divider_line_padding]

Perhaps some people think this was a bit silly to get, and the truth is these really are priceless in the sense that nearly everyone would throw this old gear out, let alone pay money for it, but I really am fascinated by old versions of this software and this box will share a spot on the wall with pride!

I now work for Alf Kuhlmann at Reel Pictures. Alf is a 3DS Max veteran who has used the software since 3DS dos R2. The box for every upgrade since then is sitting on the shelf in the studio. He’s also got a boxed copy of  ‘Illuminaire: Paint & Composition’ by Denim Software…version 1.0 of the software that later became Discreet Combustion.

[divider_line_padding]

So, to anyone out there reading this post….do you still have the older boxed versions of the software you own or do you now download everything & throw the boxes in the trash? Do you have any interesting boxed versions of old software?

I’ve made this blog post and shared these photos in response to a recent thread that was started on the CG discussion forum, CG-TALKMaya 1.0 Video from 1998.
If you have any early Maya related gear or media, add it to the discussion there!

3ds Max Sneak Peek - Populate User Example

3ds Max Sneak Peek: Populate User Example

By Digital LodeNo Comments

Buchanan’s ‘Human Spring’ has now formally been announced. I am very lucky to have been able to work with Buchanan in creating the cover art for their debut album. I had a lot of fun creating this artwork which includes a crowd made up of over 300 protesters. A lot of time spent adding many little details.

You can see a preview of the finished artwork and secondary promotional artwork on Buchanan’s website and on their facebook page.

I have put together a video with a look at how the artwork for Human Spring was made. It’s a brief rundown of my workflow for this project and how new features in the visualisation software Autodesk 3ds max 2014 were used throughout the project.


This video covers how  the new ‘Populate’ feature in tandem with the Biped system to create a large crowd of protesters. also highlights the Nitrous Viewport performance improvements in a scene with over 400 unique animated objects, a look at the new ‘2D Pan and Zoom’ tool and the use of State Sets to render out sections of the ‘Populate’ crowd separately.

Have been impressed from the start with the pure creative force behind this album and the the people who have been involved in it’s production. I’m really looking forward to May 10th when it the music is finally released into the wild!

The band’s first single ‘Human Spring’ has just been released. The video clip is about to be revealed and the song is (at the time of writing) now available free on their website.

Very excited to see the artwork in the physical release, which I hear may include an LP pressing!

Hope to share a couple of behind the scenes images at a later date.


Video Tutorial - Photoshop Smart Objects

Tutorial – Battle of the Bands Poster Design

By Digital Lode Tutorials, TutorialsNo Comments

This is a short video tutorial covering a recent poster design for a battle of the bands event. The tutorial gives a rundown of my workflow for this project, which was completed in Photoshop and Illustrator.

The main features I cover are Photoshop’s Smart Objects feature and ‘Vector Smart Objects‘ – linking illustrator vector shapes with Photoshop. These features are used to create the warped ’60’s style’ Psychedelic text.

I do a few ‘Battle of the Bands’ style posters like this every year. This time around, the client wanted a ‘sixties’ hippie/psychedelic style theme. If you’re interested in learning more about this project, you can view my dedicated entry in the Lode Portfolio section. There, you can see the main design applied to different formats for digital and print.


Main video tutorial – Battle of the Bands Poster Design:

I relied on a few great textures for this project, most of which were downloaded from LostAndTaken.com

For those unable to watch the video, a written overview of my process is detailed below:

Step 01: Reference Images

Before jumping into Photoshop,The most important thing with every poster is your theme and reference imagery. A solid theme and images for reference will guide you throughout the whole process. A amassed a collection of great images to use as reference for this job. I also found some great tutorials on this style of poster.

Step 02: Design a clear layout

The second important step for any poster is to design clear layout. I collected the body copy I was supplied with from the client and pasted into a word .doc document for reference. I had to ensure that all this information was going to cleanly fit in the design. I did a couple of rough sketches on paper to get the idea locked in. I didn’t bother scanning them in for this job.

Instead I started by drawing a VERY rough draft of all the wavy flowing lines that would separate all my text. I also kept a rough circle where the main peace symbol would go. I imagined where the main band names, support acts and secondary information would fit, and how multiple pieces of text could fit on one flowing line.

When all this was locked in, I used this layout guide layer throughout the rest of the process.

Step 03: Smart Objects

Now was the fun part. I used Photoshop to create and warp all my text. This was something I thought of doing in Illustrator first, but eventually developed a method to do this far quicker in Photoshop. It was important to be able to change the text any time, because clients are always changing text for a poster like this!

I used Photoshop’s smart objects. If you haven’t used Smart Objects before, be sure to watch my tutorial video to how this feature helped me and then I recommend you look for some tutorials if you want to know more.

Smart objects give you the ability to have a ‘non destructive‘ workflow in Photoshop  You can transform, scale and change the contents of an object without losing resolution, add and tweak filters, and go back to your original object at any point. This saves you so much time! In the video you can see how I can easily edit any of my text without having to change any of my warps, etc.

Here is a summary of my basic Smart Objects workflow for this job:

  1. I first typed out my basic text. I set the basic font, but created the text to be about 5x larger than I needed. I could scale it down after it was a smart object.
  2. I then right clicked on each layer, and converted the layer to a smart object.
  3. With these Photoshop text layers converted to Smart Objects, I could now use my warp tool to conform these shapes to my flowing lines. It takes a bit of tweaking, but i was finally able to get each object into shape.

But because these objects are smart objects, i can double-click the layer icon at any time and it will load up a new Photoshop document with my original text! Here i can change the font, change the actual text, change the colour, etc.

If while making any changes, I end up making the text bigger than the actual Photoshop document, I just re-crop it to fit. If I go to the ‘image’ menu and choose ‘trim’Photoshop will crop the document down for me!

I save this document, close it, and you can see all of my changes have been applied to my main poster!

What’s more, I can go back to my warp tool, and it remembers all my settings for the warp. I can tweak to my hearts content. If this layer wasn’t a smart object, and i returned to the warp tool, it would have reset to a square shape again. This saved me so much time!

I created all of my swirly psychedelic text and then had the design of all text approved. As expected, the text for this document changed multiple times, but because of smart objects, these updates were fairly quick and easy for me.

 Step 04: Using Vector Smart Objects with the help of Illustrator

With text approved, I then used illustrator for my final text. Watch my video and see what happens when I zoom into my document at 100% – you can see my text has pixelation and aliasing  This is to do in part with the smart objects and the warp tool. As you can see, these smart objects feature is not always perfect. But illustrator can fix that. I collapsed my layer stack by duplicating the group and hitting ctrl+shift+e (on windows).

I then saved this image out as a png, and imported that into illustrator. I added a black border around the edges so it would match up perfectly later on (watch the video to see how this helped). The live trace feature then gave me the shapes I needed.

I then selected everything and dragged it back into Photoshop again. You can see in my LODE video tutorial that the objects have been bought back into Photoshop as a vector smart object now! I can scale them and they wont loose quality. Because I had a black line around everything before sending it to Illustrator, it all lined up perfectly.

And because these shapes are smart objects, i can easily change my text colours + vectors inside of illustrator on the fly.

Step 05: Final Touches

The final touches were all kept in the Photoshop groups at the top of the layer stack. This included a few adjustment layers, layer masks and a crumpled paper texture. At the end of my video tutorial you can see the affect each layer gave to the overall poster.

I then had my main poster design, which i added crop marks, flattened the document and saved as pdf, ready to print!


That is a quick overview of my process for this poster. I hope you were able to check out the actual video and I hope you’ve learnt something new. If you have any questions, leave them as a comment on this page or on the video’s  YouTube page. Or if you have suggestions of how I could have streamlined this project further, share your ideas as well!

If you found this useful, please check out the rest of my website or facebook page, where I will strive to keep posting more videos soon.
Cheers! – Michael Wentworth-Bell.


Button Text


Reel Pictures Showreel | 3D Animation Studio from Melbourne Australia

Reel Pictures 2012 Showreel

By InspirationNo Comments

I’m currently employed 4 days a week by Reel Pictures P/L in Melbourne, Australia. Reel Pictures creates 2D and 3D animation for Broadcast, corporate, exhibitions and more. This means we’re always creating digital content for a variety of different mediums, which makes the work very fun and challenging!

Alf (Reel Pictures Founder / Director) has recently uploaded the Reel Pictures 2012 Showreel, the first major showreel update in around a year. I helped to cut the reel together.

Check Out the showreel!

It features some of the best projects the company has produced over the last few years and I was lucky to be a part of some of these!